Help Center
Appointments
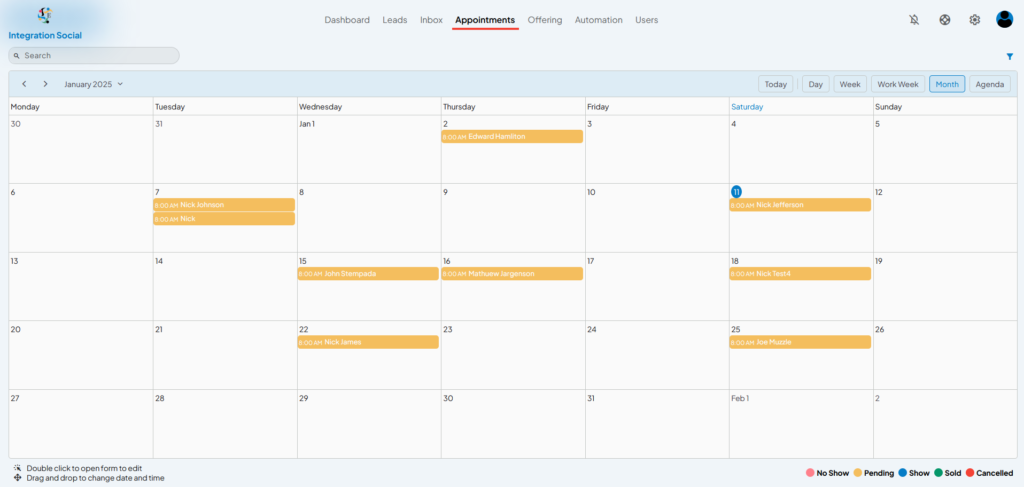
Introduction: The Appointments Module in LeadIS helps you schedule, manage, and track all your meetings with leads in a centralized calendar view. This tool ensures efficient appointment handling, providing a seamless workflow for lead engagement and follow-ups.

Key Features of the Appointments Module:
- Calendar Views:
- Switch between different calendar views, such as:
- Day: View appointments scheduled for a single day.
- Week/Work Week: Focus on your weekly schedule.
- Month: Get a complete monthly overview (as seen in the screenshot).
- Agenda: List all upcoming appointments in chronological order.
- Switch between different calendar views, such as:
- Appointment Status Indicators:
- Use color-coded statuses to track appointment outcomes:
- No Show: Red
- Pending: Blue
- Show: Green
- Sold: Yellow
- Cancelled: Gray
- Use color-coded statuses to track appointment outcomes:
- Quick Editing Options:
- Double-Click: Open the appointment details form to edit or update information.
- Drag and Drop: Change appointment dates or times by dragging events to new slots.
- Lead Information:
- Each appointment is labeled with the lead’s name and scheduled time for easy identification.
- Navigation Tools:
- Quickly navigate between months, weeks, or days using the calendar header navigation.
How to Use the Appointments Module:
- Access the Appointments Module:
- Click on the Appointments tab in the top navigation menu.
- Schedule a New Appointment:
- Double-click on an empty time slot in the calendar.
- Fill in the lead’s details, time, and any relevant notes.
- Save the appointment to add it to your calendar.
- Modify Appointments:
- Drag an existing appointment to a new date or time.
- Double-click an appointment to update its details or status.
- View Appointment Details:
- Click on a scheduled appointment to see all related information, such as the lead’s name, contact details, and notes.
- Track Appointment Outcomes:
- Update the appointment status (e.g., Show, No Show, Sold) after the meeting for accurate tracking.
Tips for Success:
- Use the Pending status to track unconfirmed meetings and follow up with leads.
- Regularly review the Agenda View to prepare for upcoming appointments.
- Leverage color-coded statuses to quickly identify appointment outcomes at a glance.
Need Help? If you have questions about scheduling or managing appointments, contact our support team for assistance.