Help Center
Embedded Forms
Embedded forms in Integration Social provide a seamless way to collect leads directly from your website. These forms automatically sync with LeadIS, enabling instant communication and automation.

Creating an Embedded Form
Access Embedded Forms:
- Navigate to Settings > Embedded Forms from the sidebar.
Create a New Form:
- Click the green + button to create a new embedded form.
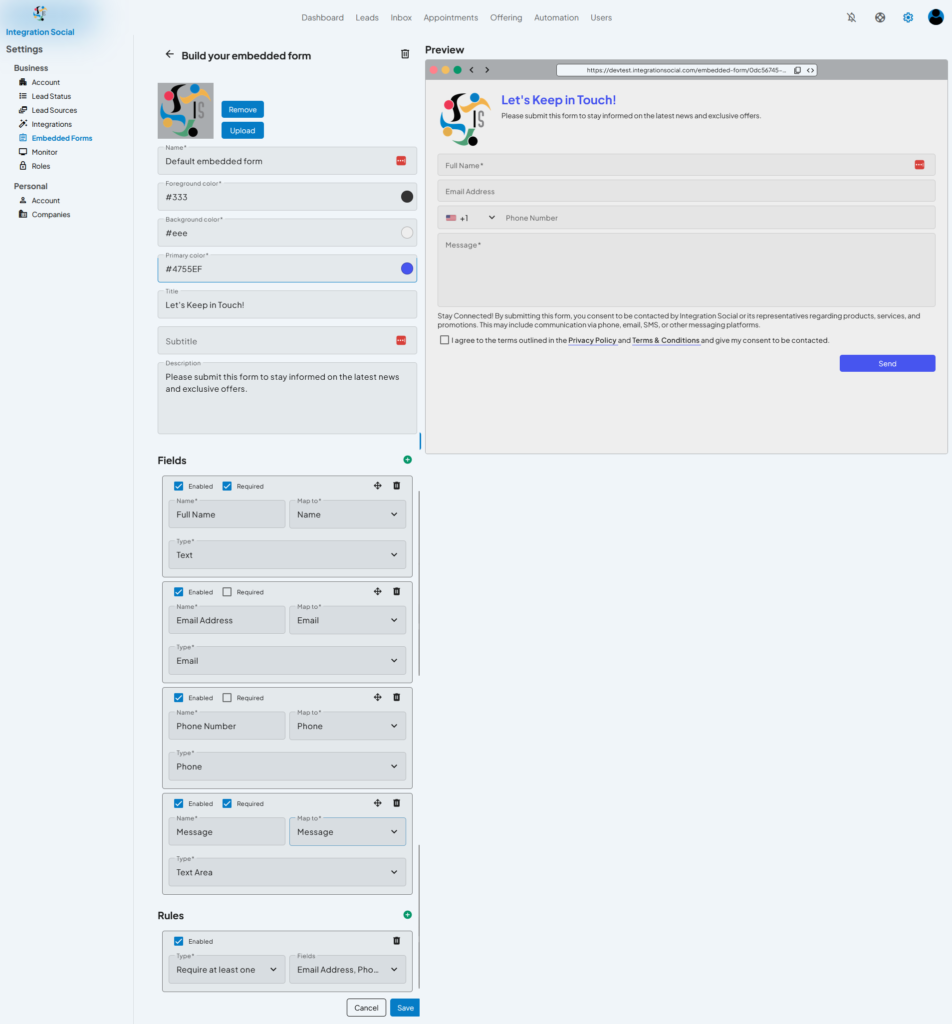
- Customize the form fields and design options.
Customize the Form:
- Add a Title and Subtitle to explain the form’s purpose.
- Set the Foreground Color, Background Color, and Privacy Policy Link.
- Add fields such as:
- Full Name
- Email Address
- Phone Number
- Message
- Configure field requirements and map them to LeadIS attributes.
Add Rules:
- Create rules to validate form submissions.
- Example: Require at least one contact method (Email or Phone).
Preview and Save:
- Use the preview section to see your form in real time.
- Save the form once satisfied.

Managing Embedded Forms
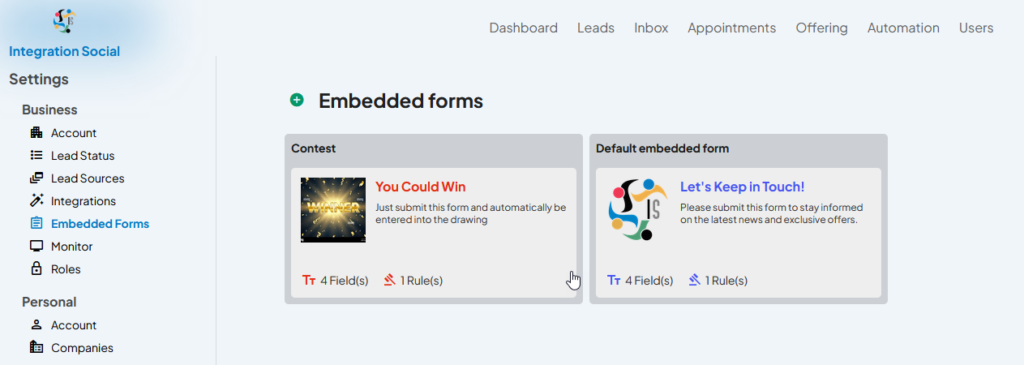
- View all your embedded forms on the main Embedded Forms page.
- Each form card displays:
- Name of the form.
- Number of Fields included.
- Validation Rules applied.
Click on a form card to edit its settings or copy its embed code.
Embedding a Form
- Copy the embed code from the form details page.
- Paste the code into your website’s HTML.
- Publish your website to make the form live.
Benefits of Embedded Forms
- Collect leads directly from your website.
- Automatically import leads into LeadIS for immediate communication.
- Customize forms to match your brand and specific lead capture needs.
Screenshot Details
- Main Screen: Displays all forms with details like field count and rules.
- Customization Screen: Shows the settings for creating or editing a form, including design, fields, and rules.